On this page
The Recycle Bin
What this is: a safety net for files you delete. When you remove a file from a job, it isn’t gone forever right away — it goes to the Recycle Bin, where you can either bring it back or delete it for good.
Open the Tools menu. Inside a job, go to the Files tab and click Tools.
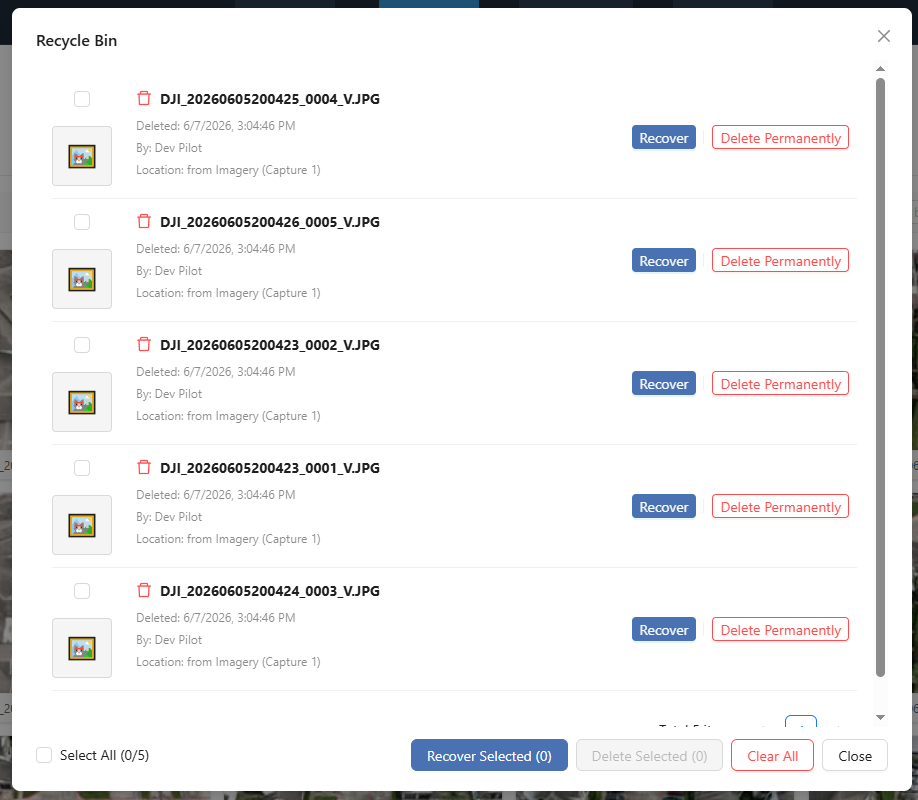
Open the Recycle Bin. Choose Recycle Bin. A window titled Recycle Bin opens, listing the files you’ve deleted — each row shows the file along with the date it was deleted, who deleted it, and its original location.
Recover or permanently delete a file. For each file you’ll see two choices: Recover puts the file back where it was, and Delete Permanently removes it for good (this can’t be undone).
Work in bulk if you have a lot of files. Use the buttons at the top of the window to handle many at once: Select All, then Recover Selected or Delete Selected — or use Clear All to permanently empty the entire Recycle Bin in one go.
Warning: Files in the Recycle Bin still count toward your storage until you permanently remove them. Deleting a file to the Recycle Bin does not free up space — you only reclaim it when you use Delete Permanently on those files or Clear All to empty the bin.
You’ll know it worked when… a recovered file reappears in its original folder on the Files tab, or a permanently deleted file drops off the Recycle Bin list for good.
Freeing up storage
What this is: reclaiming space when your account runs out of room. Storage is the online disk space your uploaded files and finished products take up, and every plan sets a limit.
If an upload fails with a message like Storage limit exceeded, that’s the signal you’re out of space. Here are three ways to fix it:
Empty the Recycle Bin. This is the fastest win — deleted files still take up space. Open the Recycle Bin (see above) and use Delete Permanently on files you don’t need, or Clear All to empty it entirely.
Delete products or jobs you no longer need. Old projects and the large products they contain (orthophotos and point clouds can be big) are often the biggest space users. Remove the ones you’re finished with — then empty the Recycle Bin so that space is actually reclaimed.
Upgrade your plan. If you genuinely need more room, moving to a higher tier raises your storage limit. See Plans, Storage & Billing for how each tier compares.
Tip: You can check how much space you’re using any time on the Memberships page — look for the Storage card, which shows your current usage against your plan’s limit.
You’ll know it worked when… the Storage card on the Memberships page shows lower usage, and your uploads go through again without the Storage limit exceeded message.
3D Path Viewer
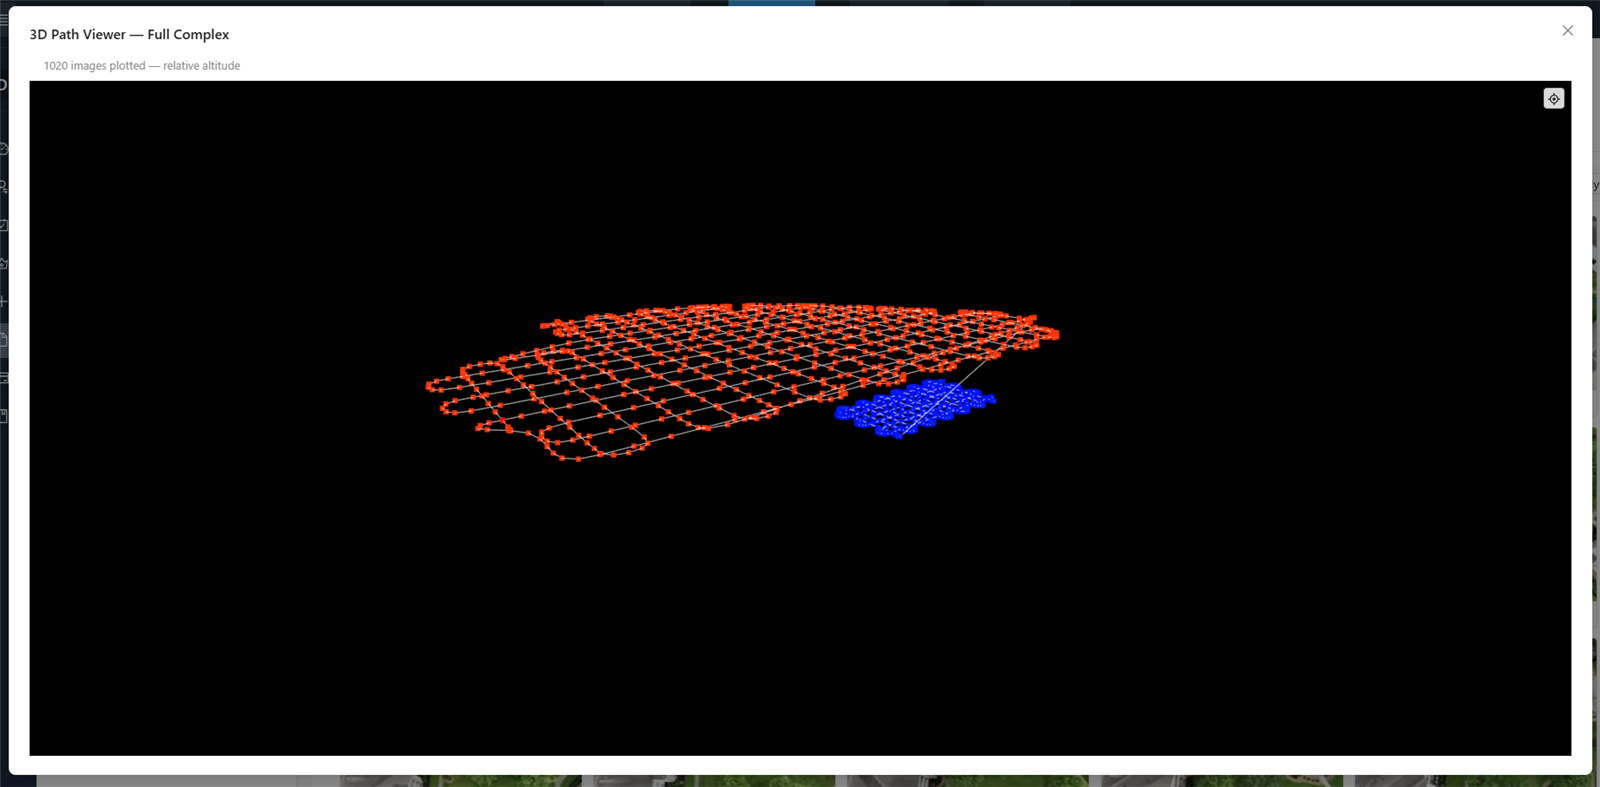
What this is: a tool that draws your drone’s flight path in 3D using the GPS location stored in each photo, so you can see exactly where the drone was when it took every shot.
What you’ll need first: a folder of photos that have GPS tags (most drones add these automatically to each image).
Pick the folder of photos. On the Files tab, open the folder that holds your GPS-tagged drone photos.
Open the tool. Click Tools, then choose 3D Path Viewer. The flight path appears in 3D, plotted from your photos’ GPS.
Inspect any photo on the path. Click a point along the path to open that exact photo side-by-side with the 3D view, so you can see what the drone captured there.
Step through the flight. Use the arrow keys on your keyboard to move from one photo to the next along the path, like flipping through the flight in order.
Note: If the path looks empty or the tool can’t plot anything, the photos in that folder probably don’t have GPS tags. The 3D Path Viewer needs GPS-tagged images to work.
You’ll know it worked when… the drone’s path appears in 3D, and clicking a point on it shows the matching photo next to the 3D view.
Add Link
What this is: a way to drop a video link into a folder so it sits alongside your files. It’s handy for keeping a YouTube or Vimeo walkthrough together with the project it belongs to.
Choose where it should live. On the Files tab, open the folder you want to add the link to.
Add the link. Click Tools, then choose Add Link and paste in your YouTube or Vimeo video URL. The link is added into the folder as if it were a file.
You’ll know it worked when… the video link shows up inside the folder alongside your other files.
Preview Mode
What this is: a toggle that puts the current capture (one dated visit to the site) into a watermarked “preview” state — useful when you want to show work-in-progress results without handing over the final, clean version.
Turn it on. On the Files tab, click Tools, then choose Enable Preview Mode. This adds a watermark / preview state to the current capture.
Turn it back off. When you’re ready to remove it, open Tools again and choose Disable Preview Mode.
You’ll know it worked when… the current capture shows its preview/watermark state, and the Tools menu now offers Disable Preview Mode to switch it off again.
What’s next? That’s the housekeeping covered. For quick answers, common fixes, and a plain-English glossary of every term in this guide, head to the FAQ & Troubleshooting page.
Next: FAQ & Troubleshooting
Quick answers, fixes for common problems, and a plain-English glossary of the terms you’ll see across DataDelivery.
Read guide →Was this page helpful?
Thanks for the feedback! It helps us improve the guide.
Still stuck?
We’re happy to help — email us and a real person will get back to you.
contact@nationaldroneservices.net