On this page
Where files live
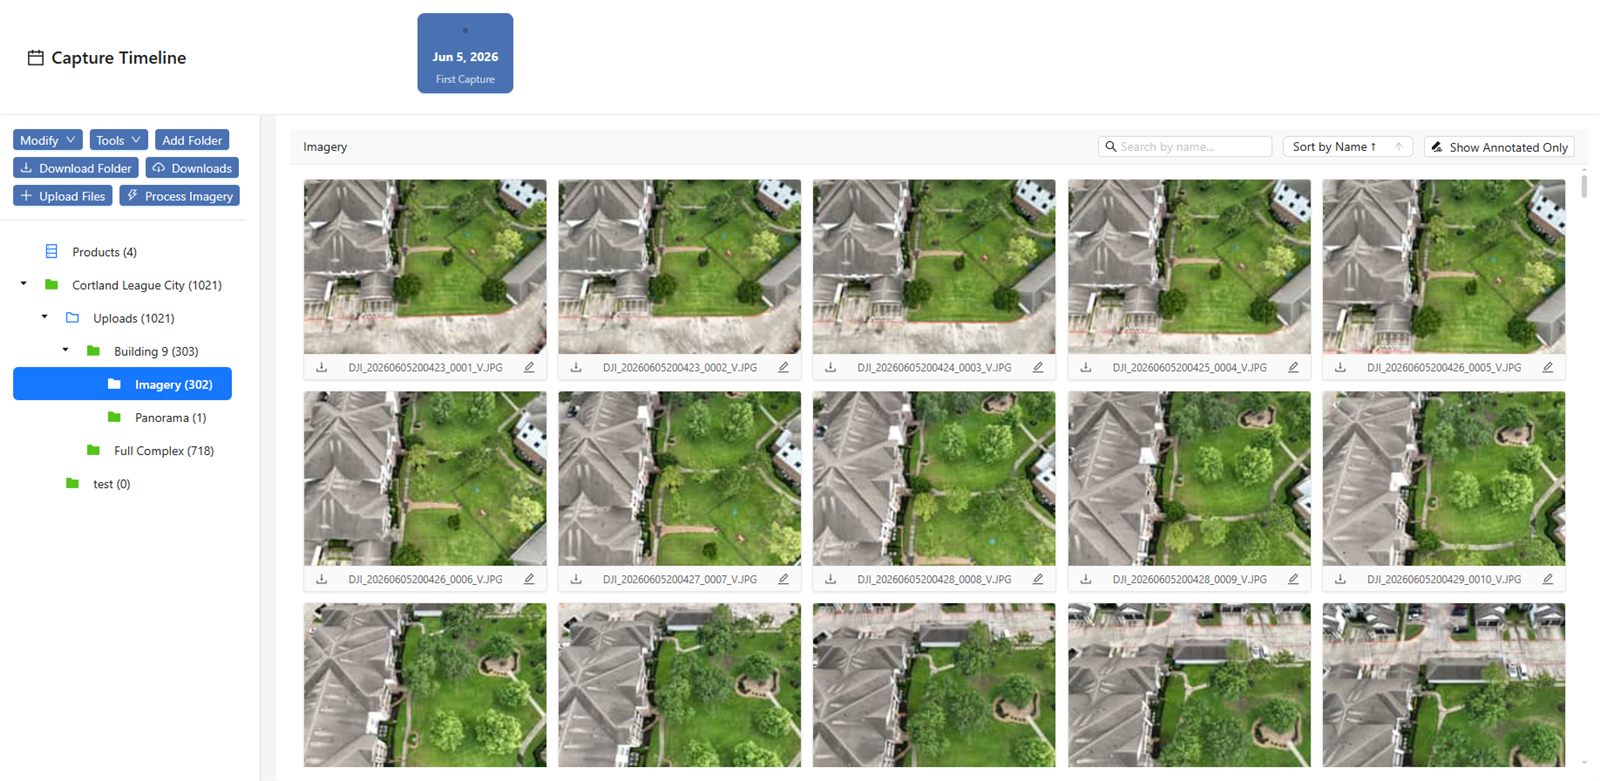
Open your job and click the Files tab. This is your file manager — everything you upload lives here. The layout has a few parts:
- The folder tree (left) — a list of folders you can click through, just like on your computer.
- The file grid (right) — thumbnails of the files inside whichever folder you’ve selected.
- Search and sort — sitting just above the grid, to find and order files quickly.
Uploading photos
What this is: the main way to get your raw drone images into your job.
What you’ll need first: the right capture selected. If your job has more than one capture, use the Capture Timeline bar to pick the one you’re uploading to before you start.
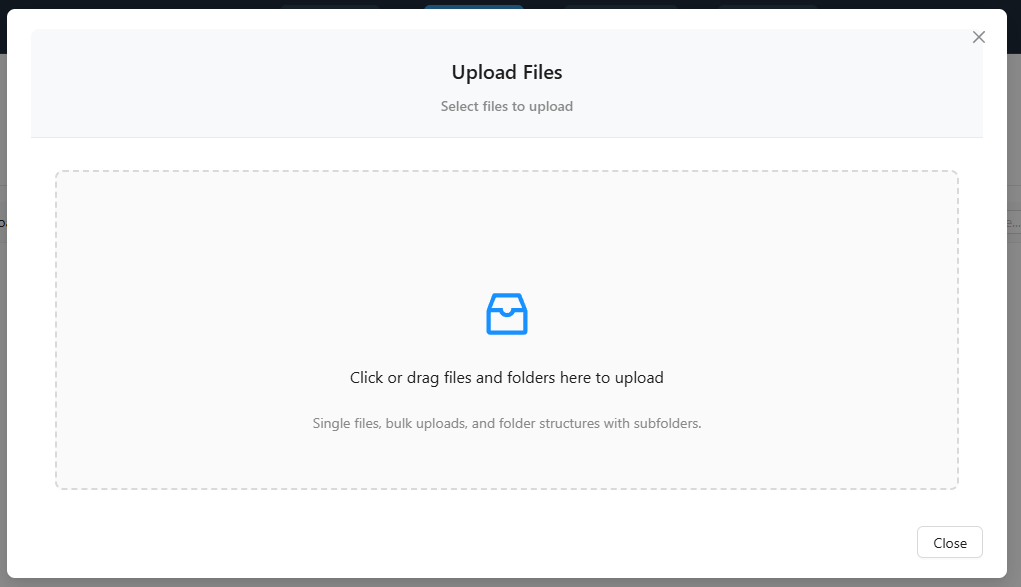
Click Upload Files. You’ll find it near the top of the Files tab. The Upload Files window opens with a large drop zone labeled Click or drag files and folders here to upload.
Add your photos. Drag your images straight onto the drop zone — you can drag in individual photos, a big batch at once, or entire folders (subfolders and all, and their structure is preserved). Prefer to browse? Just click the drop zone to open your computer’s file picker instead.
Watch the file cards. Each selected file shows up as a small card with its own progress as it uploads, so you can see exactly how things are going.
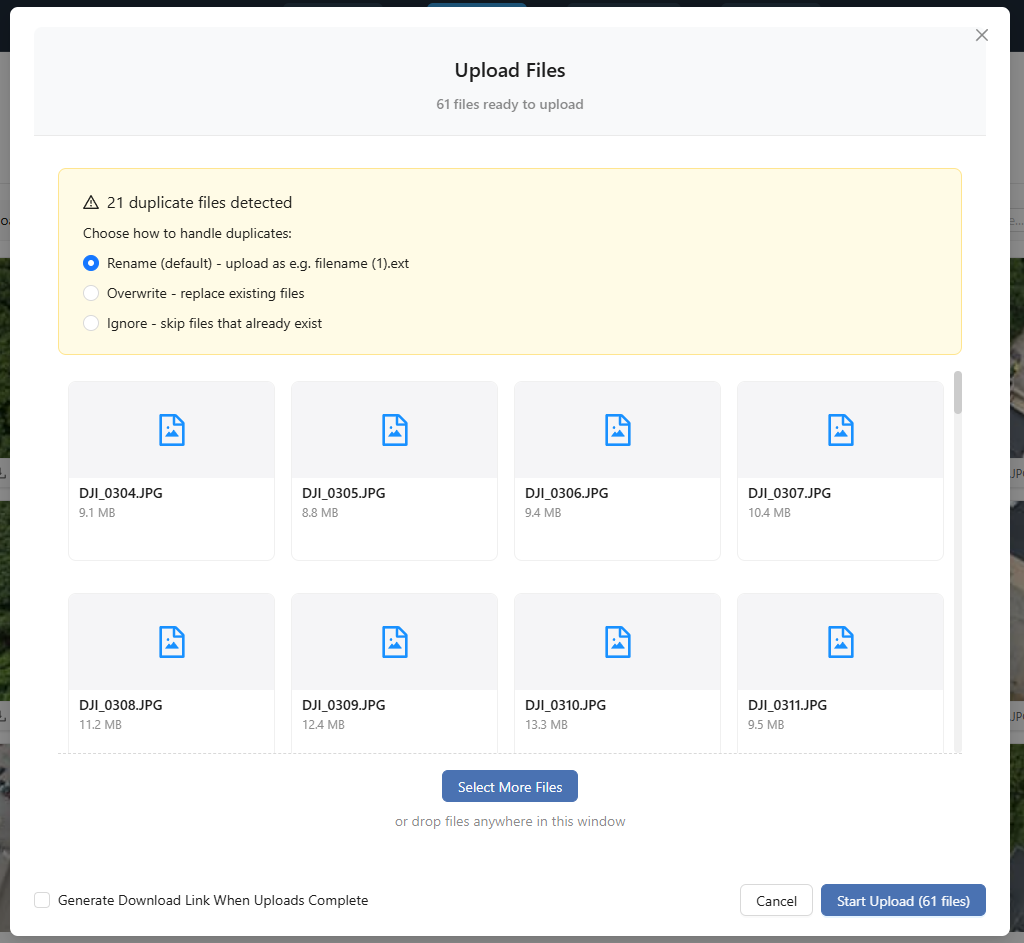
(Optional) Tick Generate Download Link When Uploads Complete. Check this box if you’d like a download link prepared automatically once everything finishes.
Click Start Upload (N files). The button shows how many files you’re sending. Leave the window open until the cards finish.
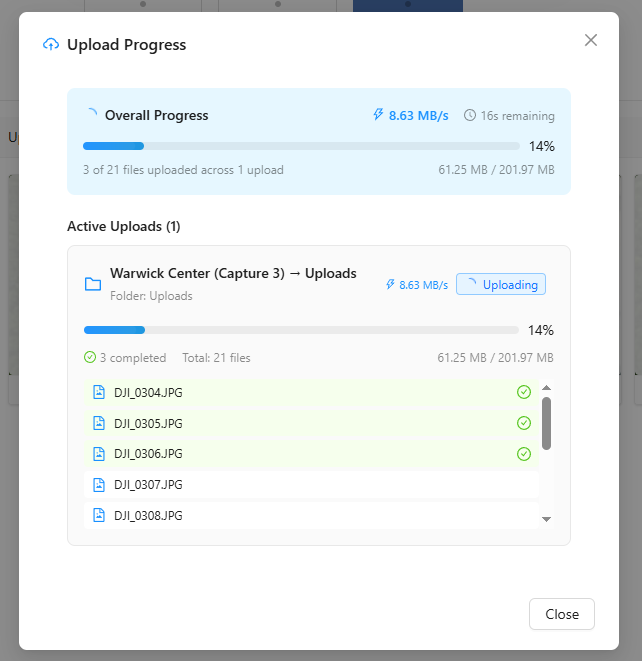
You’ll know it worked when… every file card shows as complete and your new photos appear as thumbnails in the file grid behind the window.
Tip: you don’t even have to open the window first. You can drag files anywhere onto the Files tab and the upload will start.
Handling duplicates
If some of the files you’re adding already exist in that folder, the platform spots them before anything is overwritten. You’ll see an amber alert reading N duplicate files detected, with three choices for how to handle them:
- Rename — keeps both copies; the new file gets a number added,
like
(1), so nothing is lost. - Overwrite — replaces the existing file with the new one.
- Ignore — skips the duplicates and uploads only the new files.
Pick whichever fits, and the upload continues.
Making and using folders
Folders keep a big upload organized. You might make one folder per area of the site, or one per flight.
- Make a folder — click Add Folder to create a new subfolder inside the one you’re in.
- Navigate — click any folder in the tree (or in the grid) to open it; use the breadcrumb to step back up.
- Find files — use the search and sort controls above the grid to locate or order files within the current folder.
Tip: organize photos by area or by flight from the start. A little structure now makes everything — processing, viewing, and reporting — much easier later.
Important: already-processed files go elsewhere
Warning: if you already have finished products — an orthophoto
(.tif / .tiff), an elevation model, or a point cloud (.las /
.laz) — do not add them through
Upload Files. They’ll be skipped, with a message telling you to use
Add External Products instead.
Here’s the simple rule: the Upload Files button is for raw drone photos (JPG/PNG) and supporting documents. Already-processed deliverables go in through a separate door, Tools → Add External Products, so the platform can register them as proper products and run them through the same viewing and measurement tools.
Related: Add External Products
Already have an orthophoto, elevation model, or point cloud? Import it the right way here.
Read guide →What to do next
Once your raw photos are uploaded, you’re ready for the exciting part: turning them into an orthophoto, a 3D point cloud, and contour lines. That happens with one button on the Files tab.
Next: Processing Imagery
Combine your uploaded photos into map-accurate, measurable deliverables.
Read guide →Was this page helpful?
Thanks for the feedback! It helps us improve the guide.
Still stuck?
We’re happy to help — email us and a real person will get back to you.
contact@nationaldroneservices.net