On this page
How viewers work
Every product you create lives as a file inside your job. To look at one, you open it from the Files tab — and DataDelivery picks the right viewer for you automatically based on what kind of file it is.
To open any file, go to the Files tab, find the file in the grid, and double-click it. A brand-new viewer tab then appears at the top of the job, next to your other tabs. Depending on the file, that tab will be the GeoTIFF Viewer, Point Cloud Viewer, Image Viewer, or Video Viewer.
Note: These viewer tabs are hidden until you open that kind of file. If you don't see a GeoTIFF Viewer or Point Cloud Viewer tab yet, nothing is broken — the tab simply appears the moment you double-click a matching file in the Files tab. Close the tab and it tucks away again.
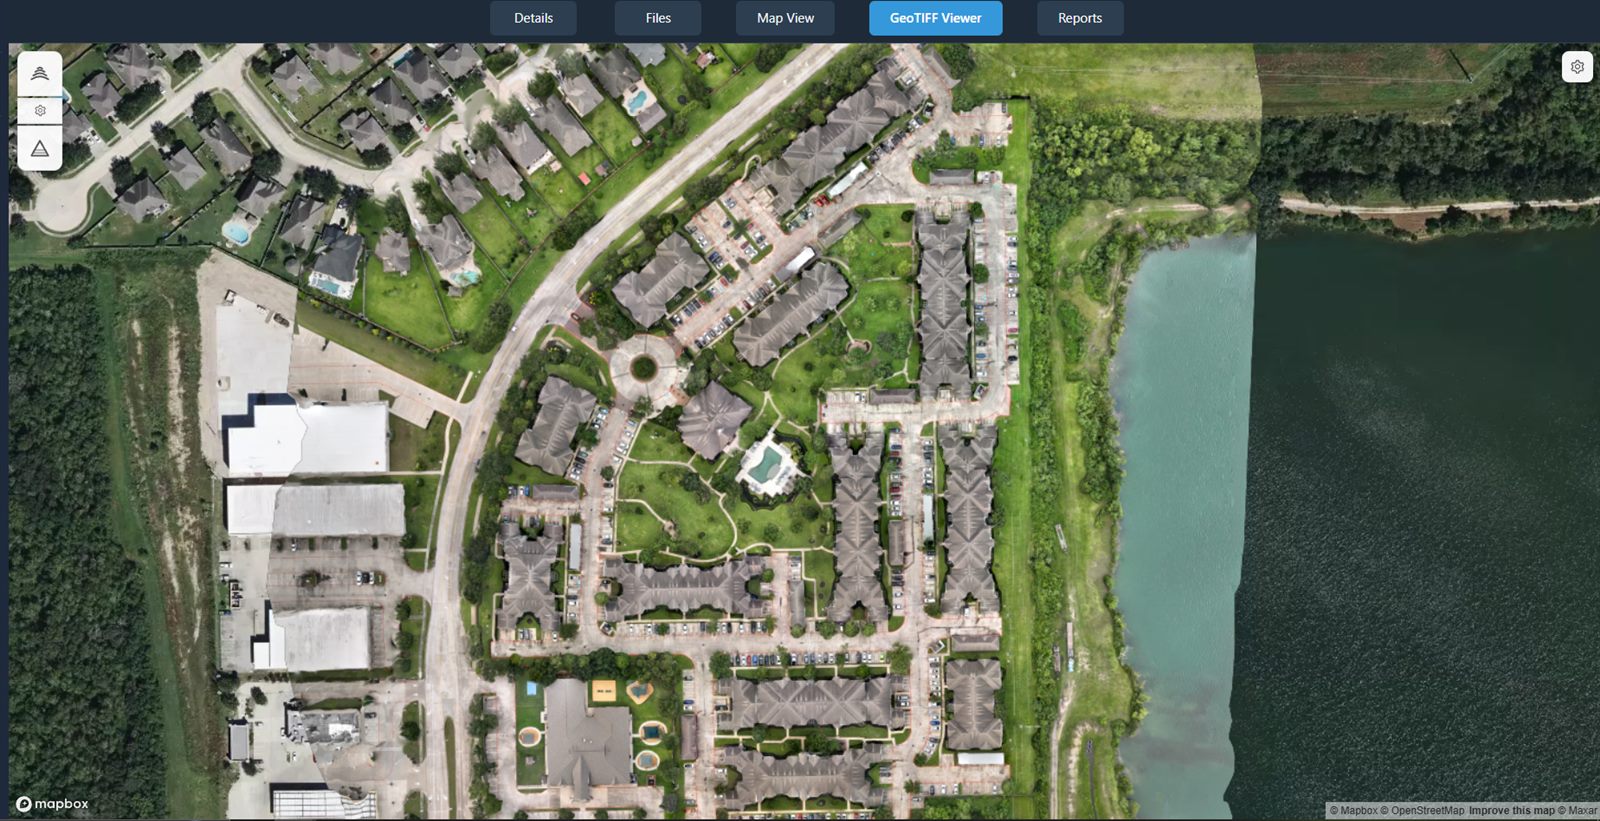
Opening an orthophoto (GeoTIFF Viewer)
An orthophoto (a single, flat, map-accurate photo stitched together from all your drone images) is saved as a .tif file in your Products folder. Opening one shows it laid over a map, so you can pan and zoom around your whole site.
Go to the Files tab and find your orthophoto. It's a .tif file, usually inside the Products folder that processing created for you.
Double-click the orthophoto. The GeoTIFF Viewer tab opens and your stitched image appears on a map.
Pan and zoom to explore. Drag to move around, and scroll to zoom in and out, just like any online map.
Use the controls in the top-right. Click Map Settings to open a Map Style picker (swap the background map) and an Overlay Opacity slider (fade your orthophoto so you can see the map underneath). When they're available for this orthophoto, you'll also see a Contours button and a Stockpile button.
Tip: The Contours and Stockpile buttons only appear when the right elevation data exists for that orthophoto. Both are covered step-by-step on the Measurements & Analysis page.
You'll know it worked when… the GeoTIFF Viewer tab is open and your stitched site photo fills the map. Try dragging and zooming — the image stays locked to its real-world location.
Opening a point cloud (Point Cloud Viewer)
A point cloud (a 3D model of your site made of millions of tiny colored dots, each one a measured point in space) lets you spin your project around and look at it from any angle. It opens in its own 3D viewer.
Find the point cloud in the Files tab. Processing saves it in your Products folder alongside your other deliverables.
Double-click it. The Point Cloud Viewer tab opens and your 3D model loads. (Large clouds can take a few seconds to appear.)
Move around in 3D. Drag to rotate the model, and scroll to zoom in and out.
Reach for the toolbar to measure. The viewer's toolbar includes measurement tools for distance, area, height, and volume — covered on the Measurements & Analysis page.
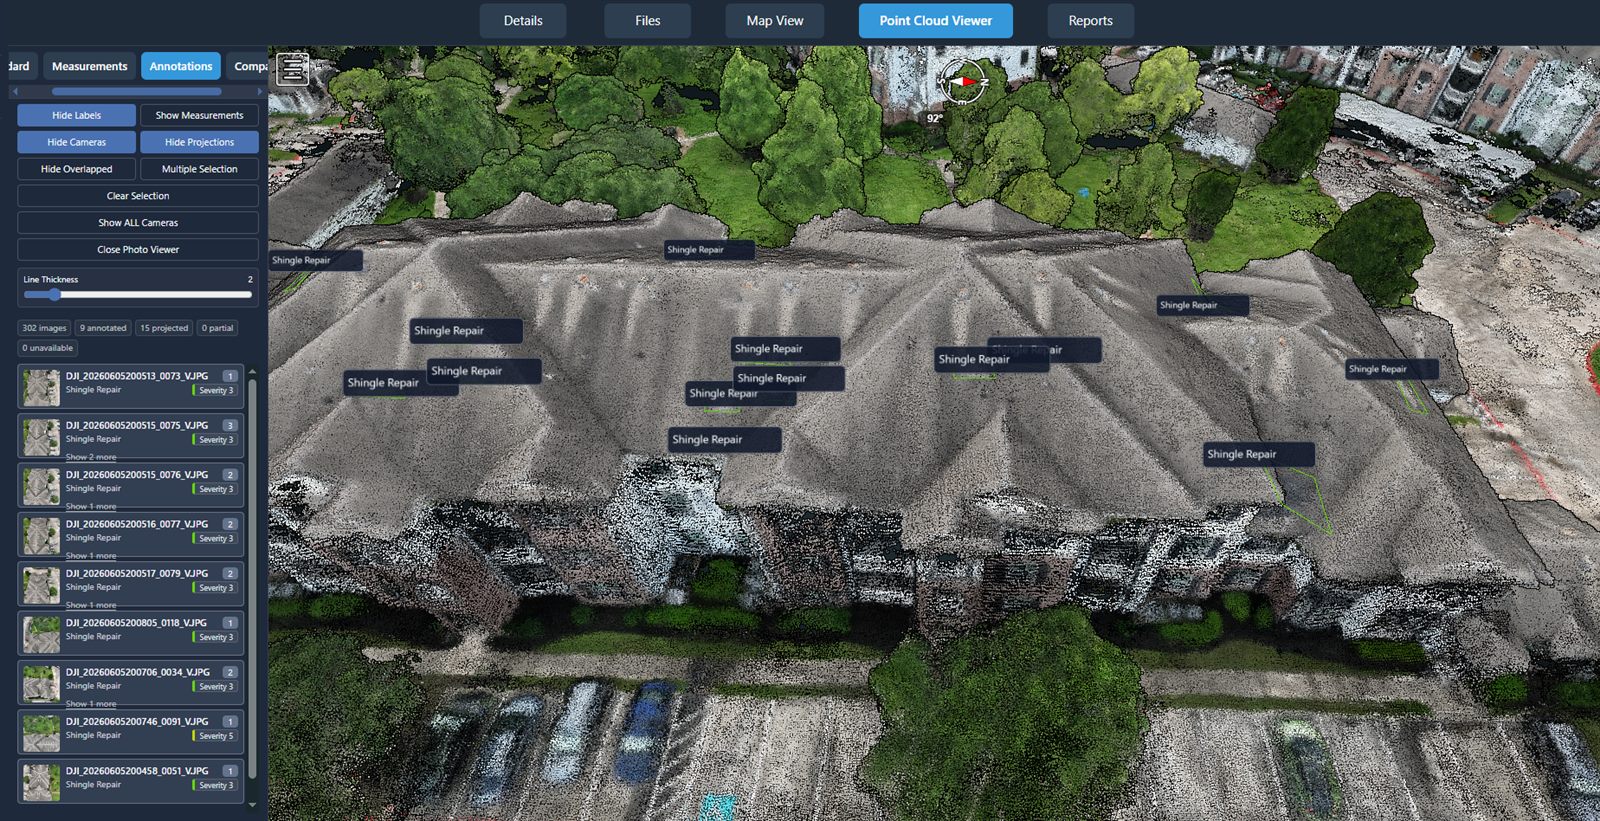
You'll know it worked when… the Point Cloud Viewer tab is open and you can drag to spin your site around in 3D.
Images, panoramas & video
Your individual photos and any videos you uploaded are also a double-click away. DataDelivery opens each in the viewer that fits it best.
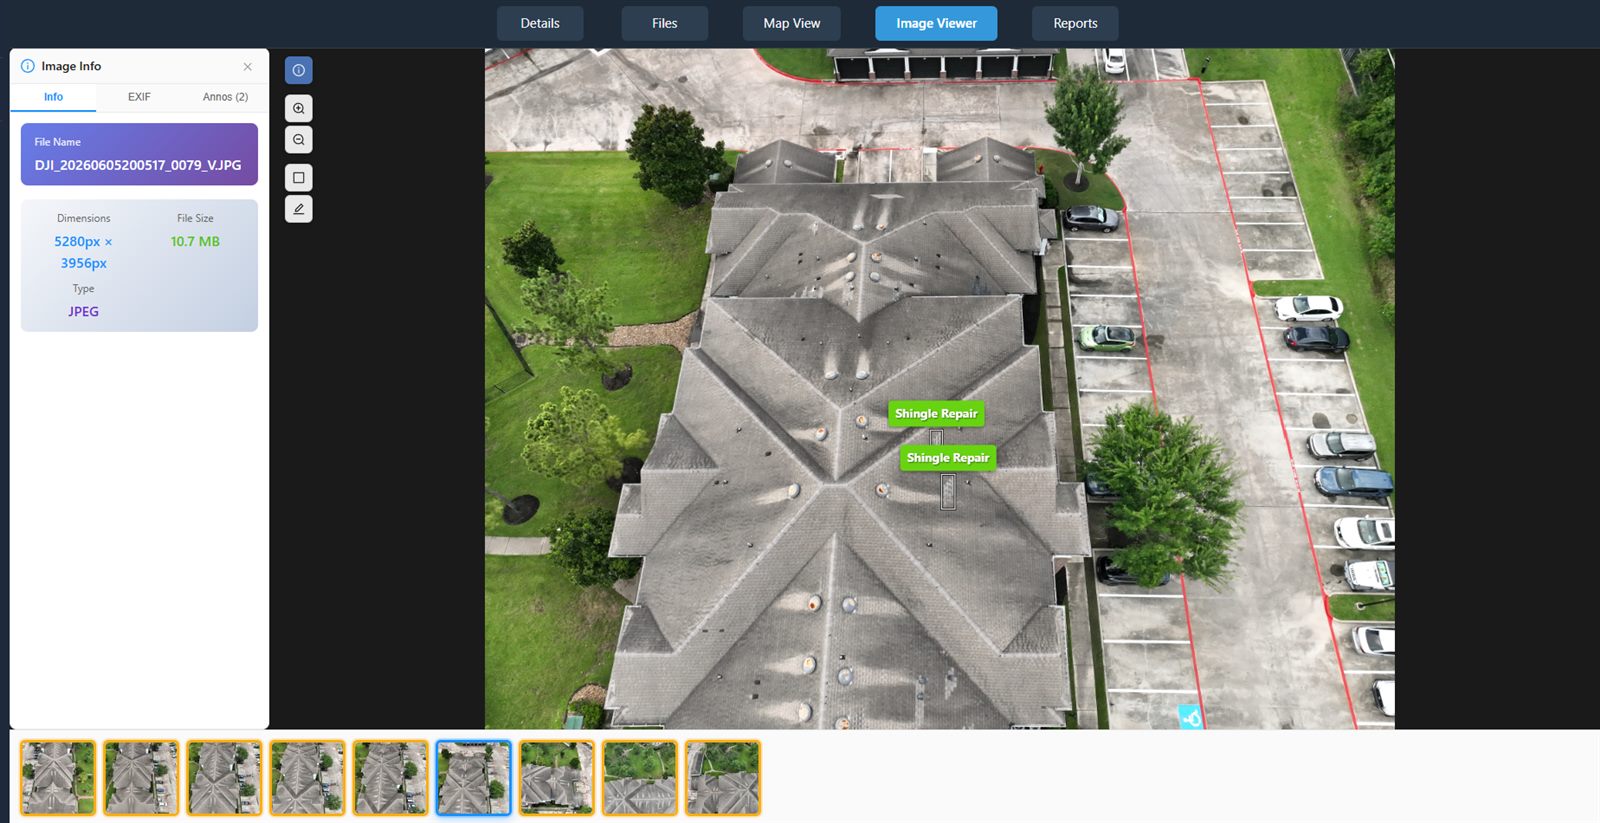
Photos — the Image Viewer
Double-click a regular photo and the Image Viewer opens. You can zoom and pan around the picture, read an info panel about it, and use annotation tools to mark things directly on the image. Annotating is covered in full on the Annotating Imagery page.
360° panoramas
A panorama (a single image that wraps a full 360° view around the spot it was taken) opens in a special panorama viewer you can look around inside. The first time you open one, you may briefly see a Processing spinner while DataDelivery builds the tiles it needs — this clears on its own after a moment, no refresh required.
Videos — the Video Viewer
Double-click a video and the Video Viewer tab opens so you can play it right inside the job.
Tip: A panorama's Processing spinner means the viewer is still building behind the scenes — just wait a couple of seconds and it opens automatically.
Related: Annotating Imagery
Mark issues and features right on your photos and map, with reusable templates and severity levels.
Read guide →The orthophoto quality report
When you process imagery, DataDelivery also records how the stitch went — and you can read that summary right from your orthophoto's thumbnail.
Look at your orthophoto's thumbnail in the Files tab. On a processed orthophoto, you'll see a small circular i button in the corner of the thumbnail (its tooltip reads View NDS Processing report).
Click the "i" button. The NDS Processing Report opens.
Read the summary. It tells you how many images were reconstructed (used in the stitch), the average GSD (ground sample distance — how much real-world distance each pixel covers, so a smaller number means a sharper map), and accuracy figures such as CE90, LE90, and GPS errors.
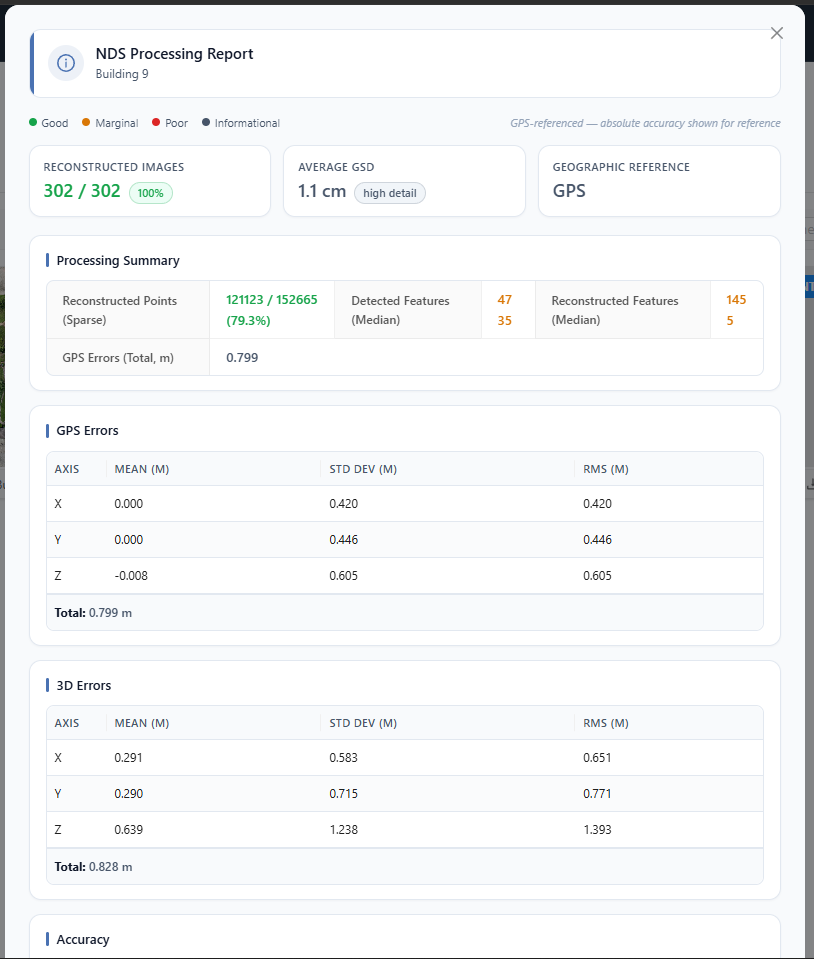
Warning: The accuracy numbers in this report (CE90, LE90, and GPS errors) are informational only. DataDelivery outputs are not survey-grade — do not rely on them for engineering, legal, or survey decisions.
You'll know it worked when… the NDS Processing Report opens and shows your reconstructed-image count, average GSD, and the accuracy figures for that orthophoto.
Was this page helpful?
Thanks for the feedback! It helps us improve the guide.
Still stuck?
We’re happy to help — email us and a real person will get back to you.
contact@nationaldroneservices.net