On this page
Opening Map View
Map View is built into every job — you don't have to open a file first. Inside a job, click the Map View tab at the top. You'll land on an interactive map already centered on your site.
Open your job. From the Personal Jobs section of the sidebar, click the job you want to look at.
Click the Map View tab. It sits in the row of tabs along the top of the job, next to Files.
Wait a moment for the map to center. The map opens already positioned over your site's location.
The toolbar
Across the right side of Map View is a row of buttons. Here's what each one does — we'll walk through the important ones in detail below:
- Layers — open a panel to turn map layers such as area measurements on and off.
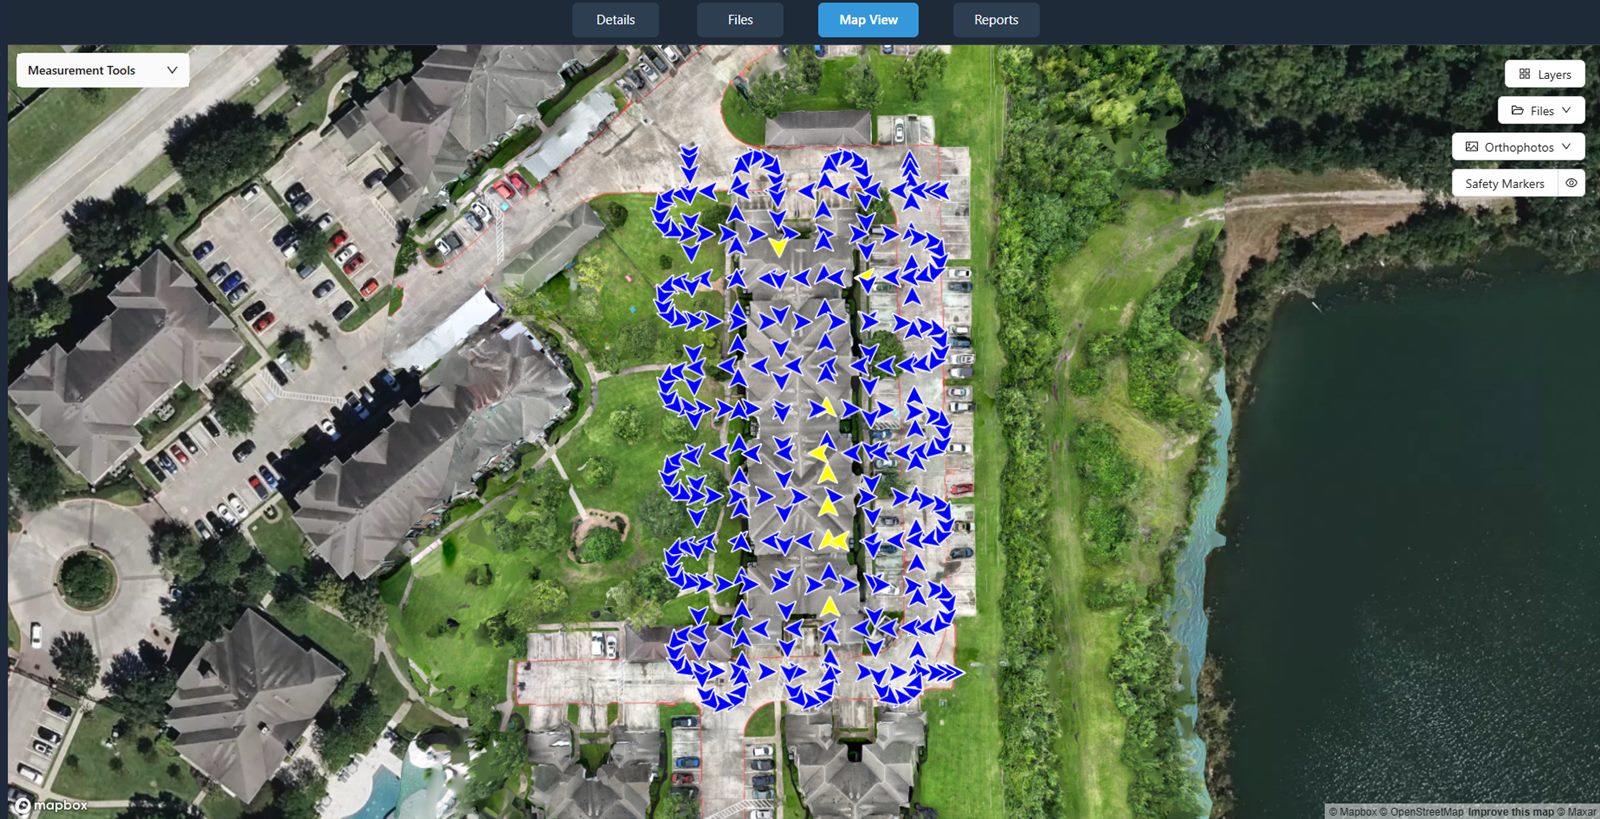
- Files — display photo locations on the map.
- Compare Images — appears when a job has two or more captures (separate visits over time), for side-by-side comparison.
- Orthophotos — choose which stitched orthophoto to lay over the map.
- Safety Markers — place and view markers on the map to flag spots on your site.
Note: A capture is one visit to your site — one set of photos from one day. Some buttons, like Compare Images, only show up once a job has more than one capture to compare.
Showing an orthophoto on the map
By default Map View shows a plain background map. To lay your stitched orthophoto (a single, flat, map-accurate photo of your site) over it, use the Orthophotos button.
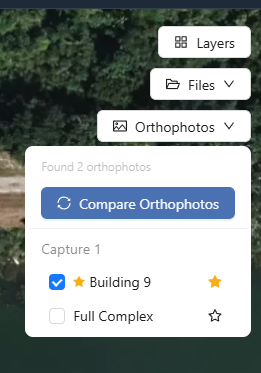
Click the Orthophotos button. A dropdown opens, with your orthophotos grouped by capture.
Tick the checkbox next to an orthophoto. It immediately overlays on the map. Untick it to hide it again.
(Optional) Set a primary orthophoto. Click the star icon next to one to make it the primary — the primary orthophoto shows on the map automatically each time you open Map View.
Note: If the dropdown says No orthophotos available, you haven't created one yet. Head to Processing Imagery to turn your photos into an orthophoto first, then come back here.
You'll know it worked when… your stitched orthophoto appears overlaid on the map, locked to your site's real-world location. Unticking it removes the overlay and leaves the plain map.
Comparing two orthophotos (before/after)
If your site has changed over time — a stockpile grew, construction progressed — you can put two orthophotos next to each other with a sliding divider, so you can drag back and forth between before and after.
Open the Orthophotos dropdown. Click the Orthophotos button in the toolbar.
Click Compare Orthophotos. This opens a before/after slider view.
Pick the two orthophotos to compare, then drag the divider left and right to wipe between the older capture and the newer one.
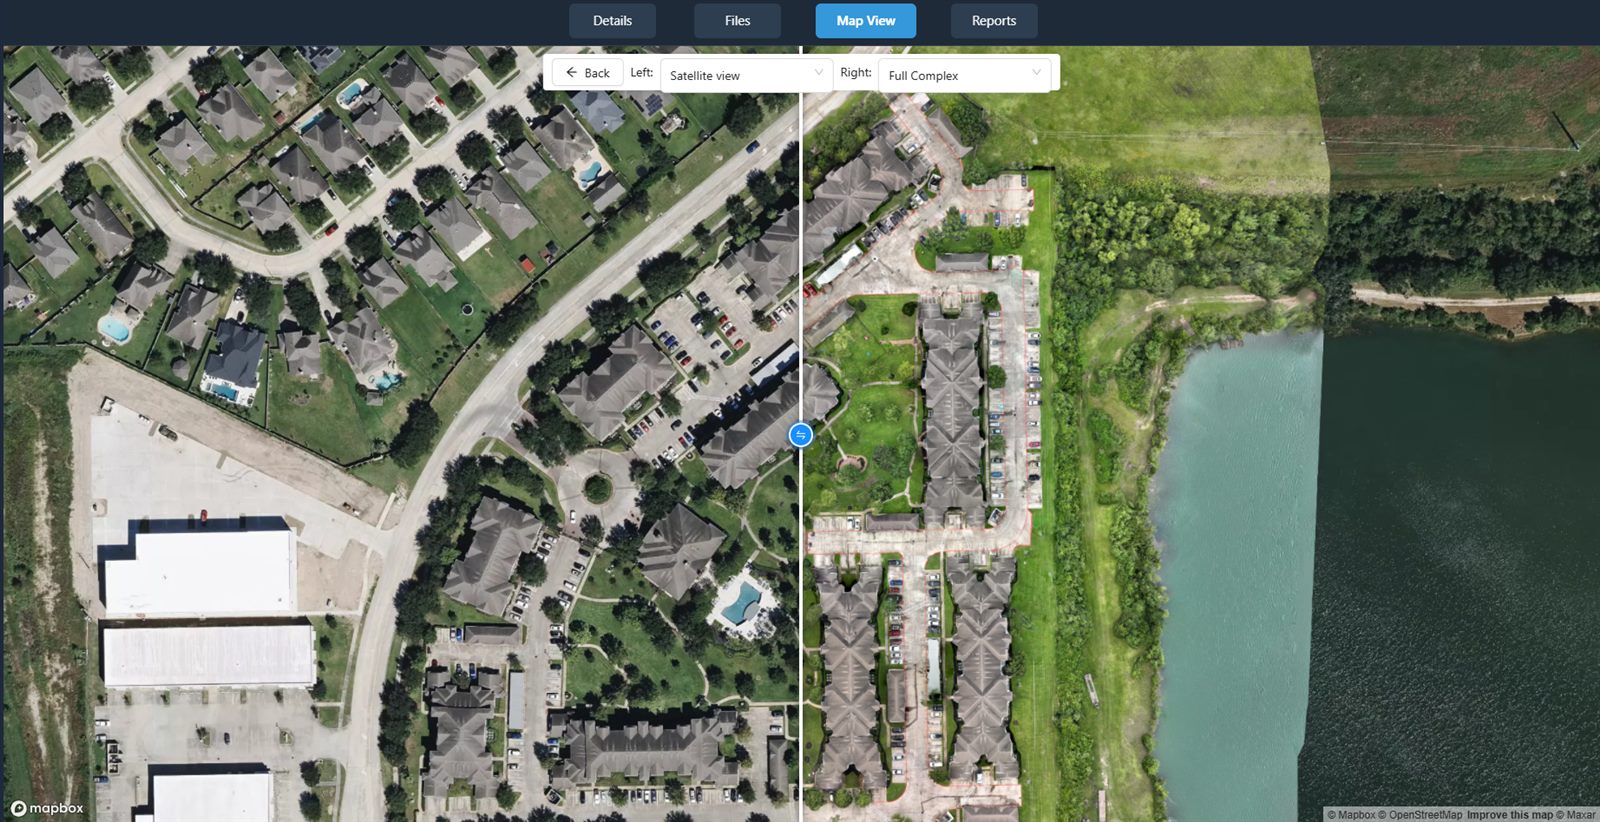
You'll know it worked when… two orthophotos sit either side of a movable divider, and dragging it wipes between the before and after views of your site.
Layers & safety markers
Two more toolbar buttons help you control what's on the map and call out specific spots on your site.
Layers
Click Layers to open a panel where you can save and modify measurement layers.
Safety markers
Click Safety Markers to place and view markers directly on the map. Use them to flag hazards, points of interest, or anything on your site worth pointing out at a glance.
What else you can do here
Map View isn't just for looking. It's also where you measure and annotate straight from the map — for example, drawing a boundary for an area measurement on your overlaid orthophoto, or marking an issue on a photo at a precise location. Those workflows have their own pages:
Related: Measurements & Analysis
Measure stockpile volumes, generate contour lines, and take measurements right from the GeoTIFF Viewer.
Read guide →Related: Annotating Imagery
Mark issues and features on the map and on your photos, with reusable templates and severity levels.
Read guide →Was this page helpful?
Thanks for the feedback! It helps us improve the guide.
Still stuck?
We’re happy to help — email us and a real person will get back to you.
contact@nationaldroneservices.net